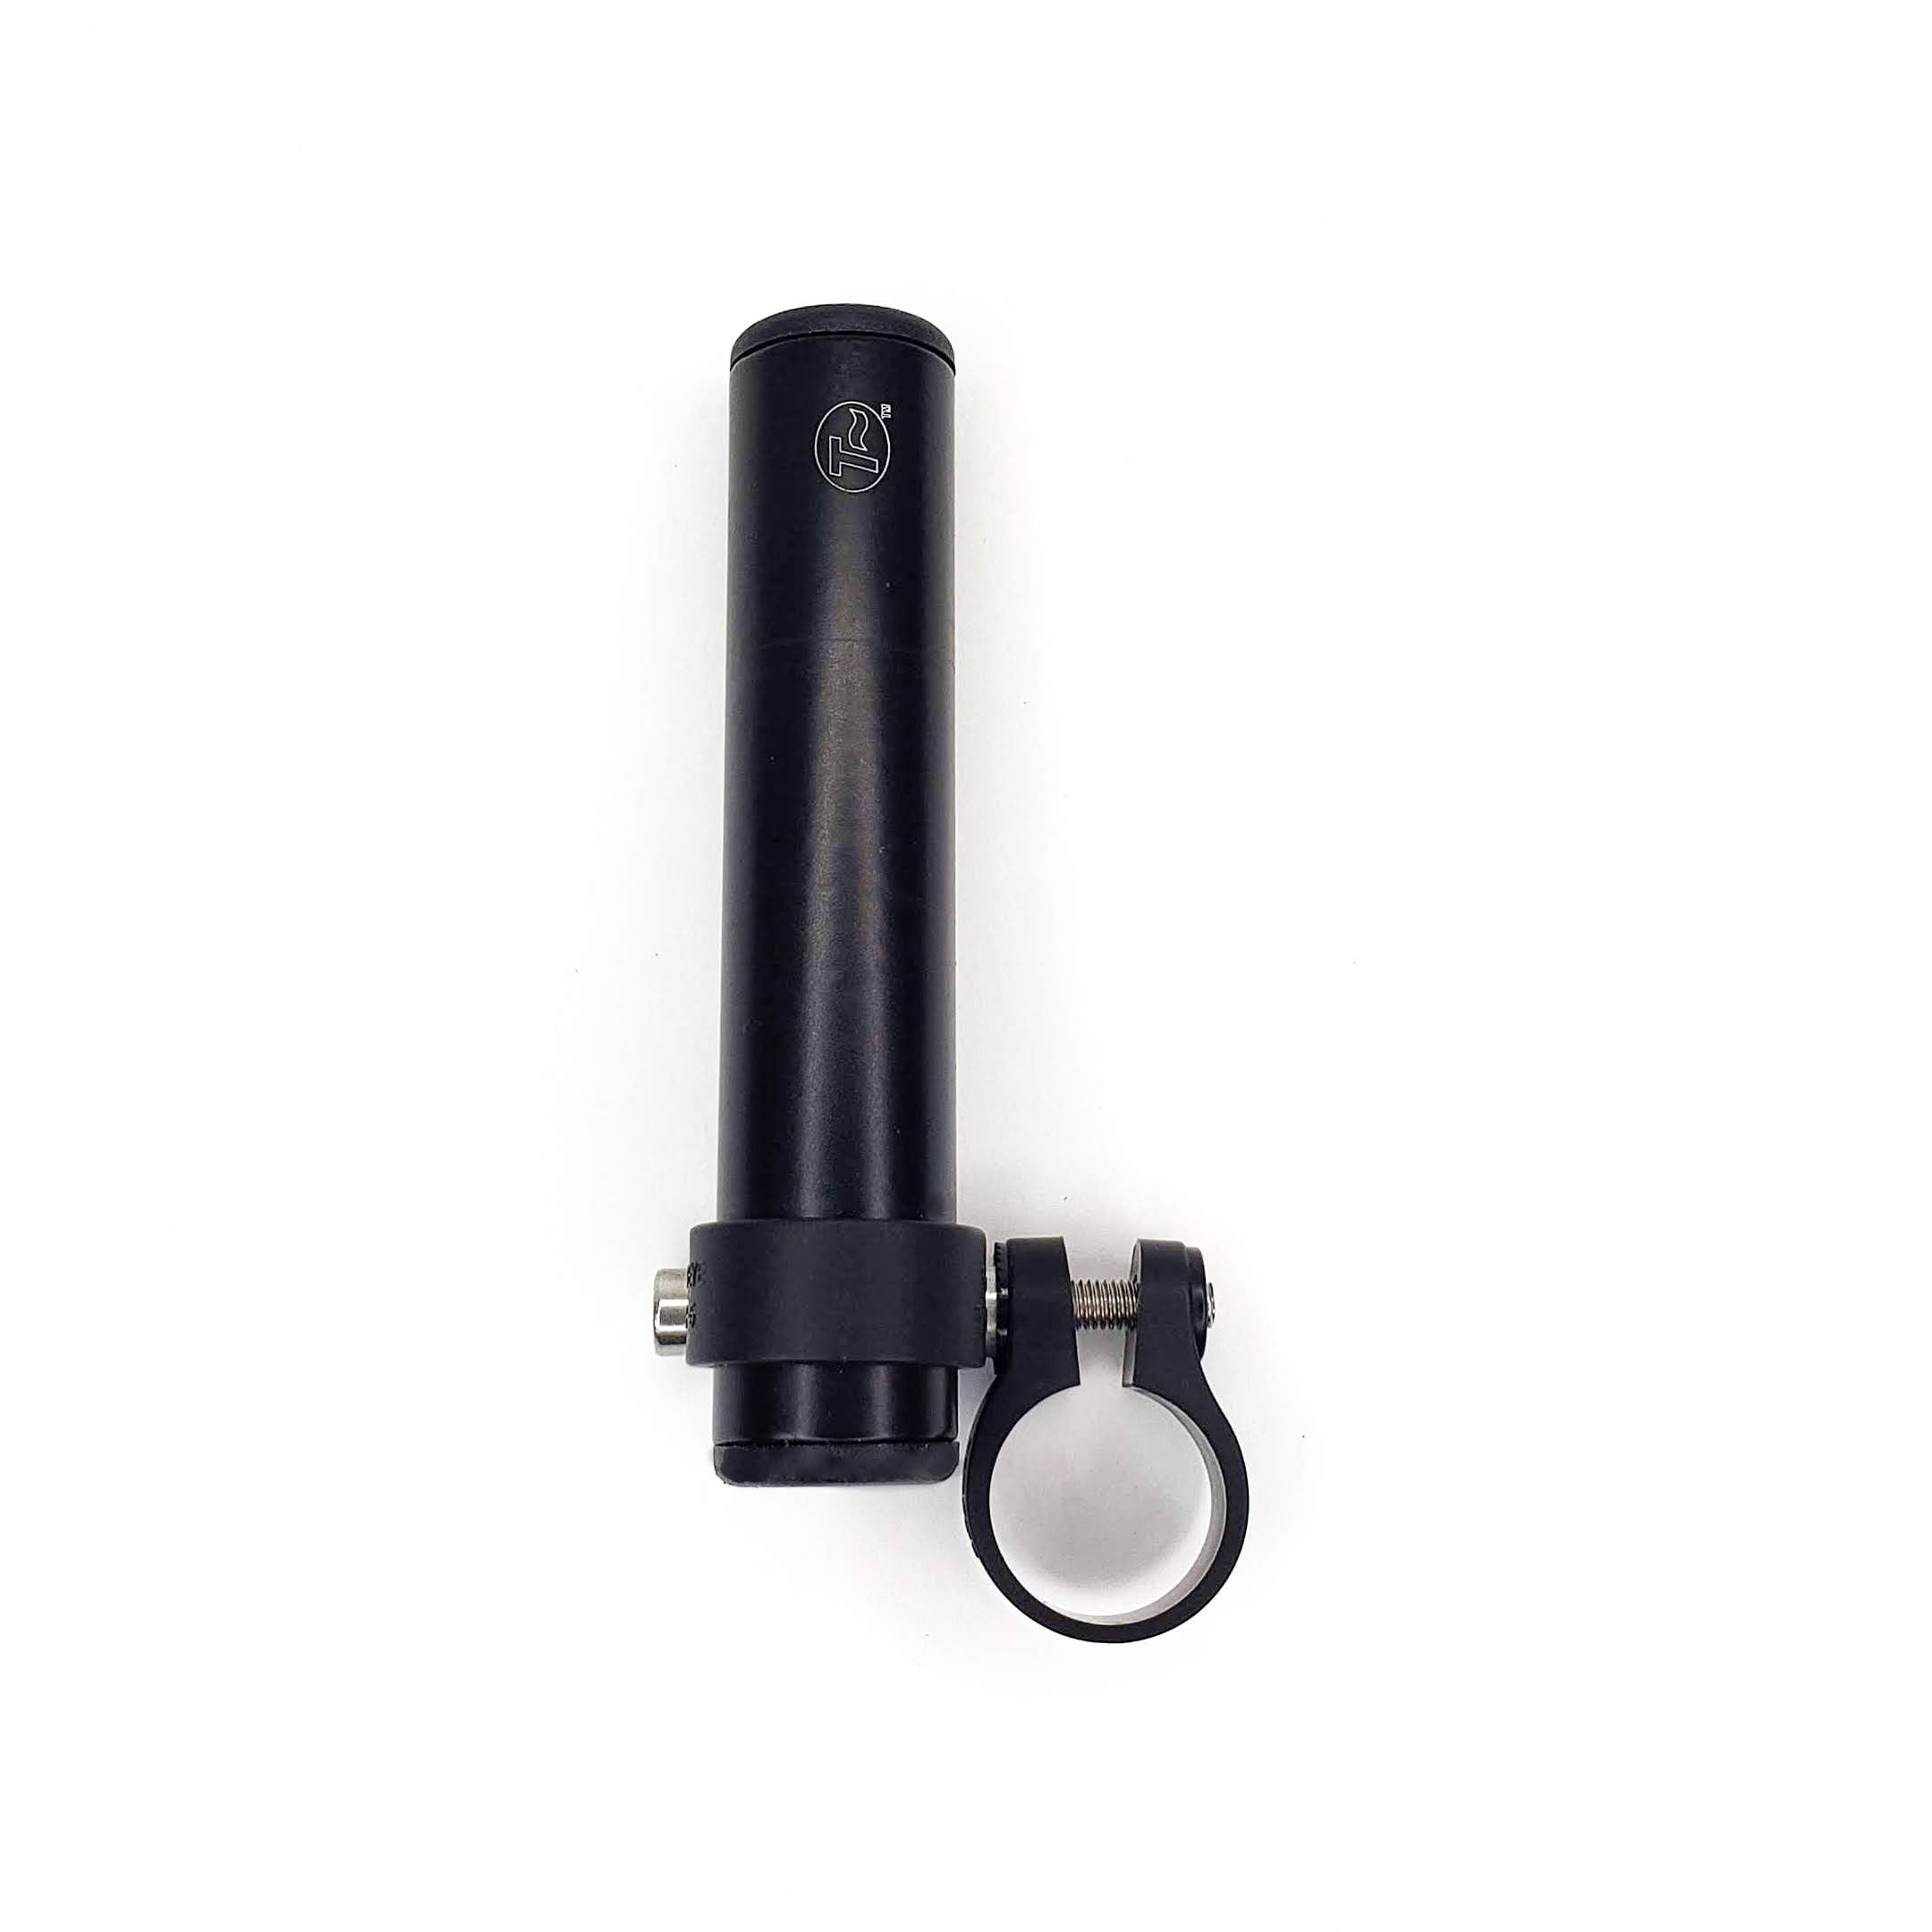
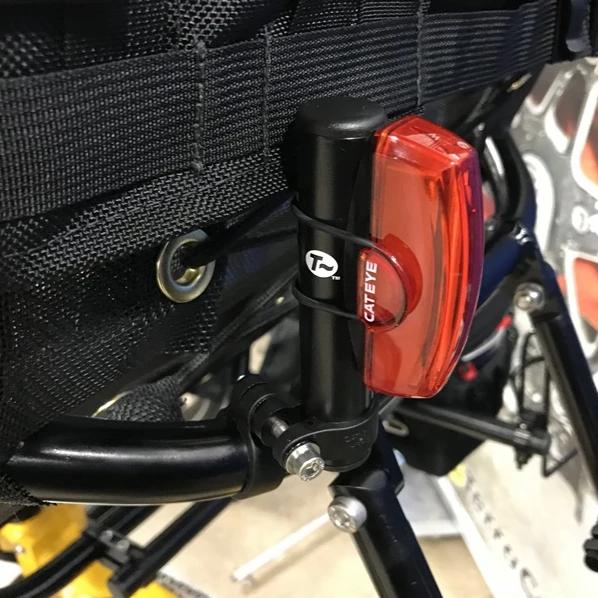
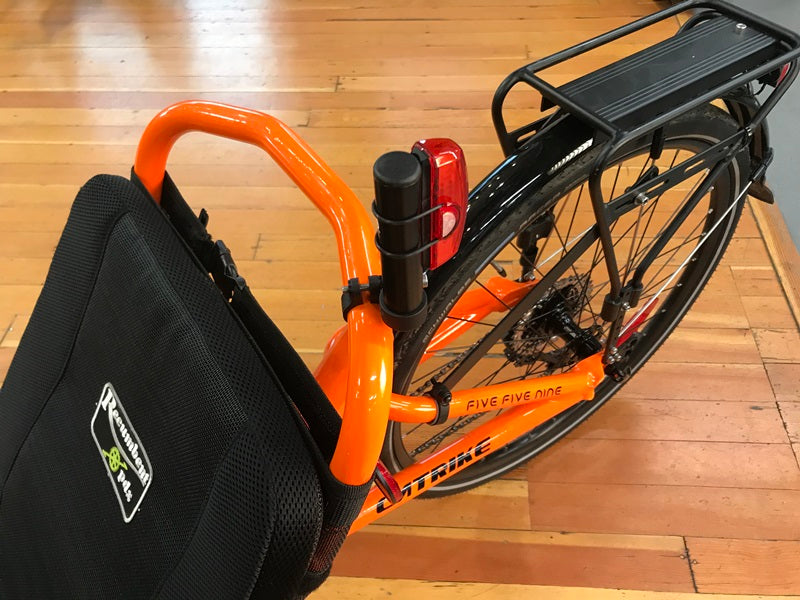
Finally! A good way to mount vertically oriented rear lights on the backs of recumbents! Rear lights are important for safety. Recumbents often don't have good places to mount them, especially if the light was designed to go on a vertical tube like an upright bike seat tube. How do you create a vertically oriented tube on the back of a recumbent? With this! This mount attaches to almost any tube in almost any orientation, and allows you to create a vertically oriented tube sticking up from it. The locking swiveling clamp system is super simple and holds really well. Simply snap the clamp over the tube you want to attach to, swivel things around until they are lined up the way you like, and tighten the bolt. Attach your light and away you go!
FAQ
1. What does this do?
It attaches all sorts of places on oddly angled tubes and creates a nicely vertical or horizontal place to mount things like lights. It's really handy for mounting rear lights on recumbents.
2. Where can I put it?
Almost anywhere. Higher is usually better with rear lights. The clamps are available to go on round tubes anywhere from 1/4 inch up to 1-1/4 inch. Tubes smaller than 1/2 inch require a rubber shim; the rubber shims are 1" outside diameter. So- things like rear rack rods are now available for attaching lights!
3. Will it hold my light?
If your light is any normal sort of bike light, yes. Anything of a reasonable size and weight will work.
4. Really? That simple?
Yes, really.
INSTALLATION INSTRUCTIONS
-
Decide where you'd like to attach a light. Tubes at any angle are OK, as long as they are between 1/4 inch (6mm) and 101/4 inch (31.8mm). So things like horizontal tubes across the back of the seat, seatstay tubes that angle up to the back of the seat, all those are OK. Measure the tube and order the corresponding clamp.
-
Remove the bolt from the clamp assembly and set aside. Snap the open clamp around the tube where you want to attach things. Reinsert the bolt and start the threads.
-
Swivel the light mounting tube around to the orientation you want. Keep in mind the light mounting tube can be positioned to the left or to the right of the tube it's attached to; if in the course of your swiveling things around, it winds up on the opposite side from where you want it, remove the clamp from the bike/trike, rotate the clamp 180 degrees, and snap it back on. It will now swivel to the side you want.
-
When things are lined up the way you want, tighten the bolt. If the clamp is not tight enough, you may need to insert some of the provided grey plastic shim. Start by trying the entire shim; if that's too much, cut off 25% and try again until the fit is right.
-
Attach your light.
ADDITIONAL INFO
- Mounts use modified Cateye brand band clamps. Cateye clamps are very strong and available in a wide range of sizes. We modify the clamps to add a special bushing to allow them to be joined back to back. Serrations on the clamps lock them to each other. Choose the size of clamp that matches the size of the tube where you want to attach. The tube where you put the light is 4 inches long and 7/8 inches in diameter, so any bike light will fit.
- Clamps available for attaching to tubes from 1/4 inch to 1-1/4 inch (6mm to 31.8mm). Clamps are fine tuned by adjusting the length of the provided shim. Special 1 inch OD rubber shims are provided for tubes under 1/2 inch.
- The tube where the light is attached is 7/8 inch (22.2mm) OD and 4 inches (100mm) long. The tube is black powder coated aluminum.
- Fits nearly any bike or trike, upright or recumbent.